Would you like to creep up your yard for Halloween? Maybe you’ve thought of tombstones, but want to avoid all that messy grave-digging business.
Headstones and tombstones can also be expensive and heavy. And, unless you’ve taken a night class, you know that monument engraving can be tricky.
Good news! You can skip all that and still have the authentic look you want.
Just follow along with my How-To Guide to Making Cardboard Tombstones.
1. Materials Needed.
Cardboard, probably from boxes
Newspaper or old paper
Découpage glue
Spray paint: lots of gray; rustic umber and flat black for accents
Hot glue gun with glue sticks
Stencils for epitaphs
Ruler
Pencil or marker
Paintbrush
Box-cutter, or scissors and a capable wrist
X-ACTO Knife, or exceptionally accurate skills with scissors
Strong tape: packing or duct
Weights: rocks, old toys, sand, food storage, etc.
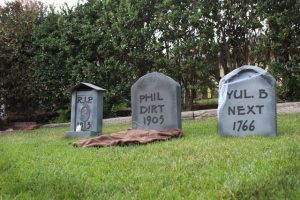
2. Measure and Cut Tombstone Shape
Take a cardboard box and pull it apart so it lays open. This is your canvas, you lucky artist.
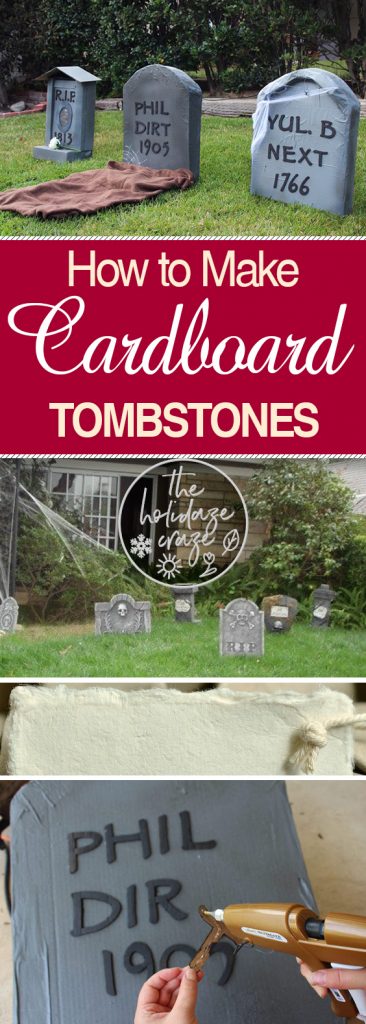
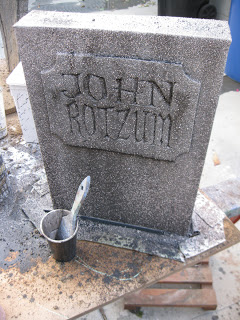
Using your ruler or eye-balling skills, measure and draw out a basic rectangular shape. If you want a curved top, trace the top as such using the bottom of a bowl that size (or with a drafting compass if you have one). Or, try to make a triangular-topped one like the picture.
A small tombstone is about two feet tall, but more difficult to read from afar. A ridiculously large one will need big lettering and more paint.
I highly recommend leaving a bottom on your grave-marker. Do so by measuring an extra fold of rectangle all along the base.
Whatever you draw, repeat the exact same thing on another piece of cardboard. You’re making a three-dimensional tombstone, you know.
3. Measure and Cut Support Pieces
Use your leftover cardboard strips to build an X, or a frame, or random strips. These will help your tombstone have the support it needs throughout its midsection.
Even if you’re accustomed to fudging it, you’ll need to measure how deep you’ve made the stones. Use that attached bottom piece you cut, so the supports will fit inside. Otherwise, you’re going to have an oddly pregnant stone.
Tape the supports to the inside of one of the stones before assembly.
4. Attach the Pieces Together: Build the Tombstone
Set your two cardboard shapes next to each other the way they will need to be attached. Line up the bottom pieces, and possible side and top flaps. If you didn’t make attached side or top flaps, now is a good time to measure and cut some out.
Then, go crazy with tape. You want this sucker to be as sturdy as taped cardboard, after all.
Don’t tape it completely closed until you put the supports and weights in.
Any tape on the outside might affect the look, so don’t get too carried away with layering.
5. Weigh Down the Tombstone
Using the loose toys, shoes, sand, or whatever you have, fill a small bag or two and shove it inside your cool 3-D headstone. You can also just jab some rocks down in there.
Another option is to stake the suckers at the base, though that can be problematic if the ground has already frozen or you have rocky topsoil.
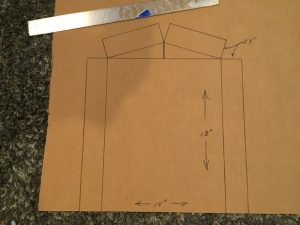
6. Papier-mâché!
Cut your newspaper into even strips.
Or, “laze” it up like me and tear them off. It’s all going to be painted in the end.
Lay the strips around gaps, cracks, and edges. Apply decoupage to stick them on.
Note: I recommend against making your own papier-mache, to avoid pests eating away at your floured creations. It’s happened to me.
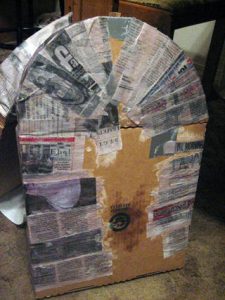
7. Paint and Paint Effects
Once the glue is dry, you’re good to paint! Set aside a well-ventilated area that can have stray gray color sprayed around it.
Practice some fine street art skills to evenly cover all surfaces that people might see. (This means you don’t have to worry about the bottom. I just gave you permission!)
After it dries, spray a layer of rustic umber for a more authentic color. After that dries, you can lightly mist some flat black to the sides and bottom of the front for shading effects.
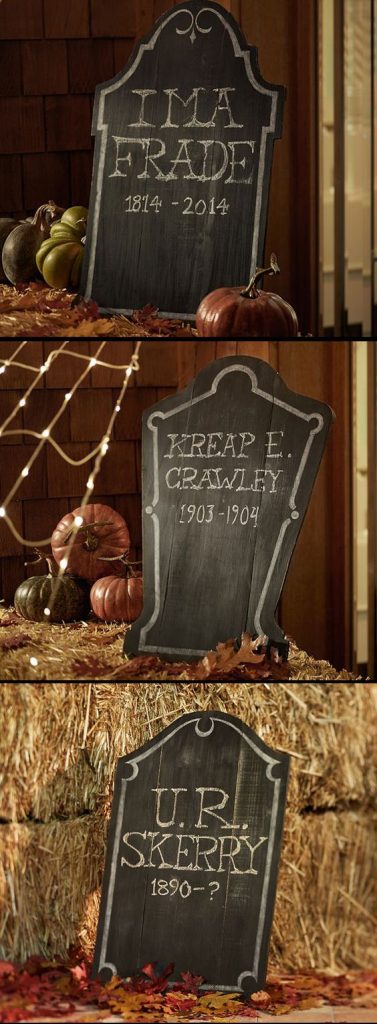
8. Epitaphs: Ideas
This is the part where your creative skills will really shine. Sure, people might notice the cool paint job you did, or a funky shape you managed to pull off -but, you know and I know that most visitors look for a clever saying.
Need ideas? I’ve got your back.
From the mind of a late-night blogger (me), I give you Cardboard Tombstone Epitaph Ideas:
Anita Shovel, Pierce D. Hart I Ran with Scissors, Ima goner
Ima Frade, Kreap E. Crawley, U.R. Skerry (from Pottery Barn)
Al B. Back, Ded N. Gone, Myra Mains
M.T. Toom, Yul B. Next, Rusty Chain
Chris P. Bacon, Bea A. Fraid, Vacancy (with an arrow pointing down)
Or, go with a classic:
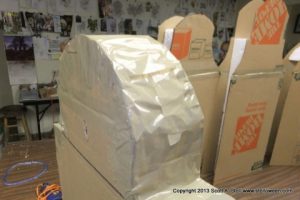
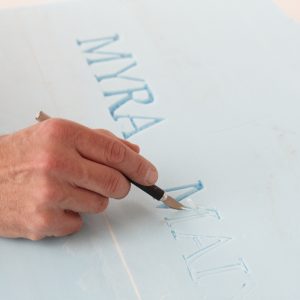
9. Epitaphs: Trace and Cut Letters
After figuring out what you’re going to say on the tombstones, you’ll want to actually apply those names somehow.
Using your stencils, trace out the letters you’ll need into more cardboard. Use the X-ACTO Knife or mad scissors skills to cut them out.
Grab the flat black spray paint and douse the letters. You may want to border them in with scraps so they don’t blow away.
Note: Letters may also be applied by drawing on the headstone with permanent marker, or printing them on a computer and cutting those out. Some DIY sites like using foam since it’s easier to cut through. The cardboard lettering looks pretty cool, though.
10. Paste the Letters On
Once all paint is dry, use your hot glue gun (or the one you borrowed) to apply the letters. Don’t forget to put them in order of the name you’re creating.
That might be awkward to have “M.T. TMOO” instead of “M.T. TOOM.”
11. Add Extra Details
If your glue gun is dripping glue anyway, grab it and detail on a spiderweb pattern or two. Add some drips with it.
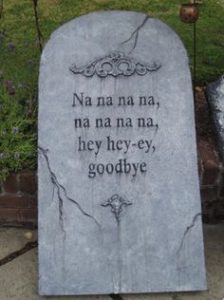
Also, if you’ve got the extra time, there is this cool stuff called faux stone effect spray paint. You can spray it on your finished product for a look like the stone pictured.
You did it! Now, go cemetery up your yard.

Leave a Reply