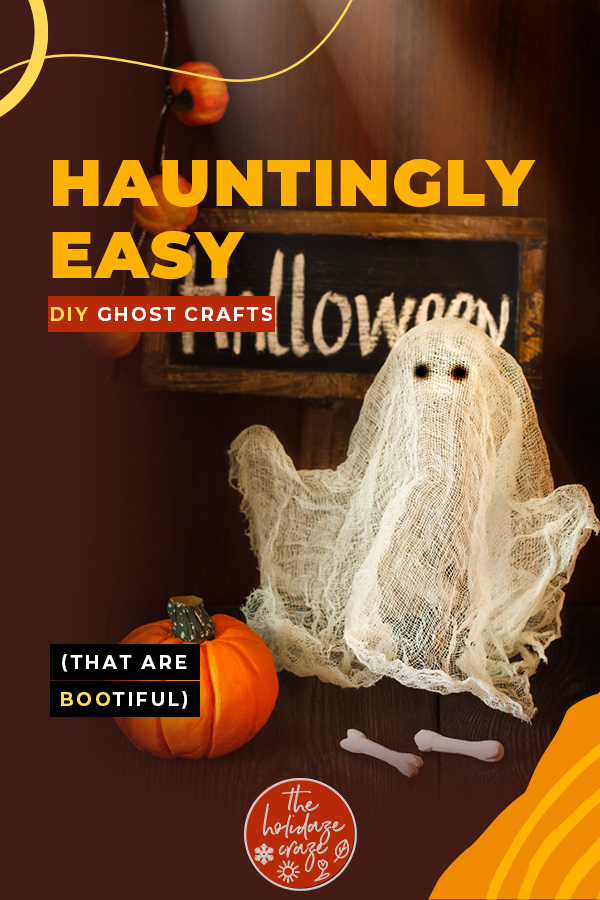
One of my favorite Halloween accessories is ghosts. Why? Because they are simple to make, match almost everything and are quite frankly, bootiful. So, whether you’re looking for large or small ghosty friends, I’ve got the info you need to make your own ghost crafts.
Hauntingly Easy DIY Ghost Crafts (That Are BOOtiful)
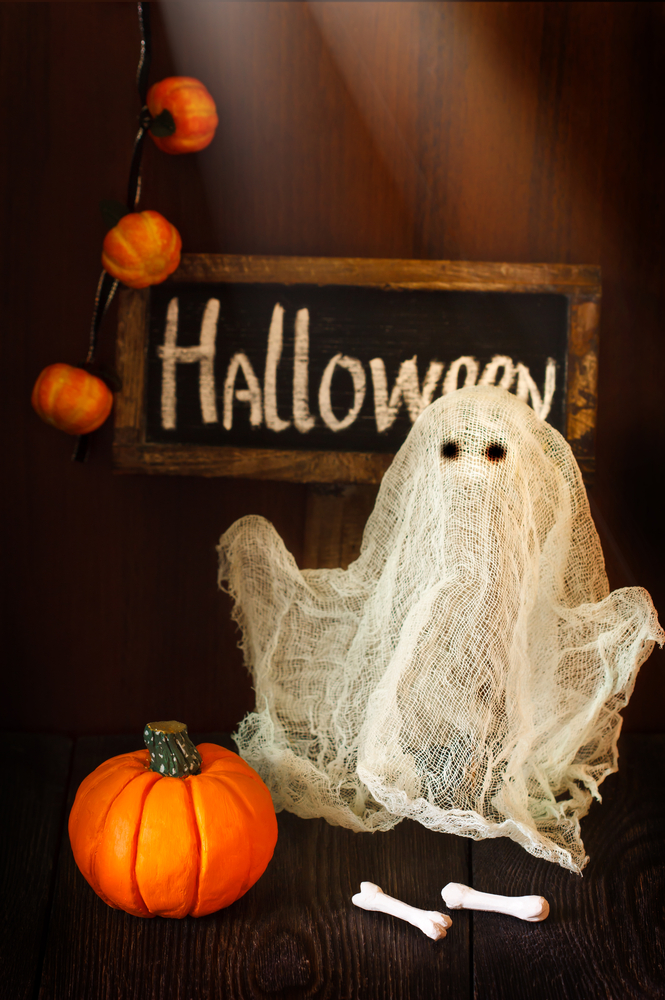
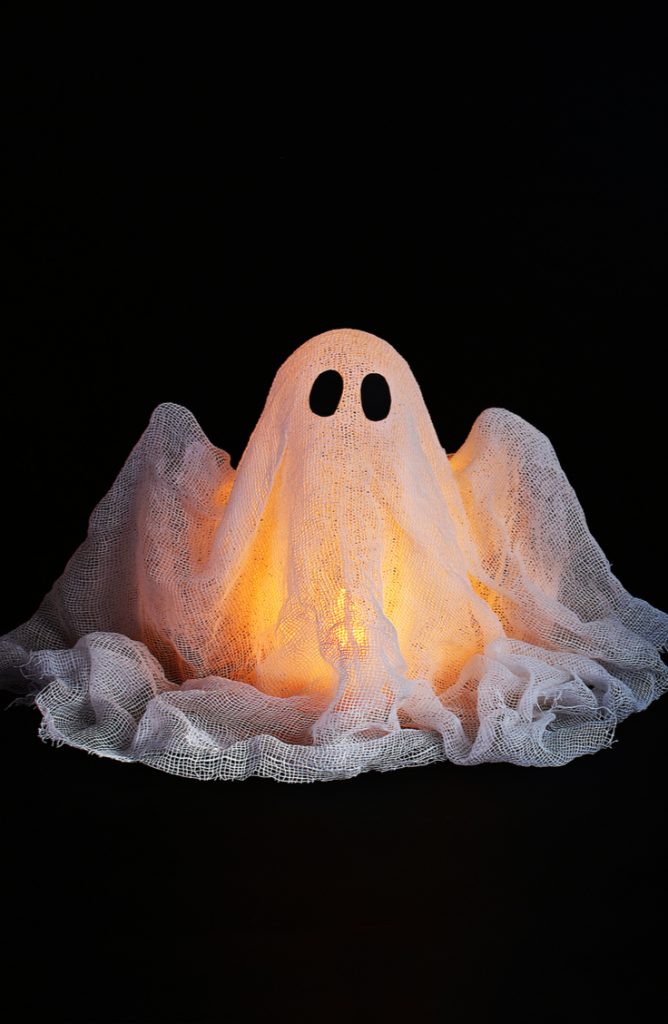
Idea 01: Cheesecloth Ghosts
Cheesecloth is perfect for creating ghosts. Why? Because it’s relatively inexpensive, easy to work with, and doesn’t require a lot of work to look good.
Materials:
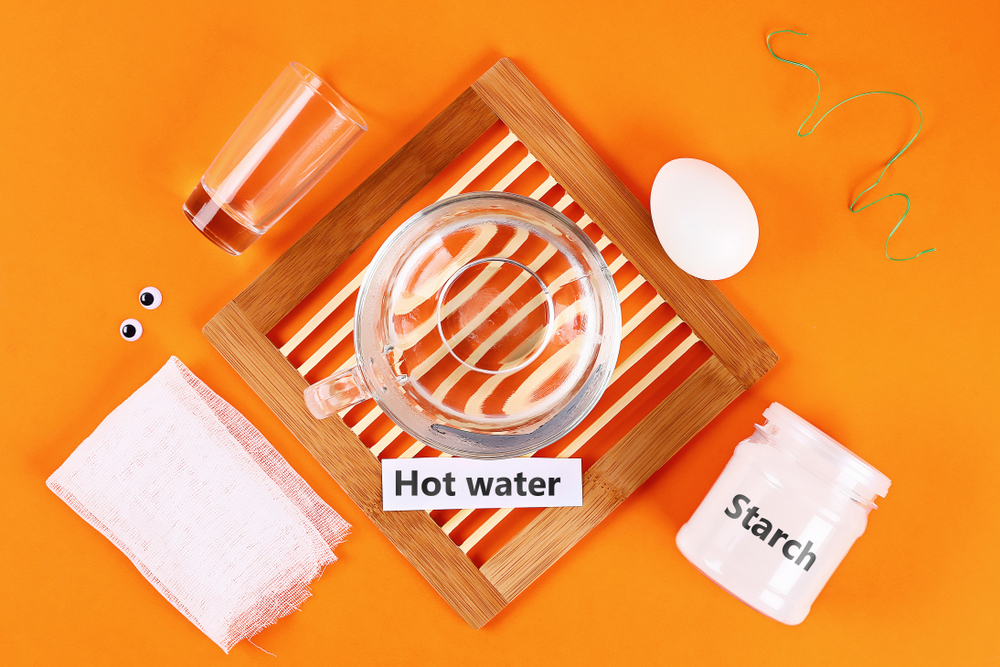
- liquid starch (or starch and hot water)
- cheesecloth
- form: either a cup and egg or mason jar and balloon
- pipe cleaners or wire
- black felt or googly eyes
Process:
Begin by setting up your form. This can be as simple as setting up some pipe cleaner in a glass and setting an egg on top (see photo below). If you want a larger ghost, try using a large mason jar and a balloon with the pipe cleaner.
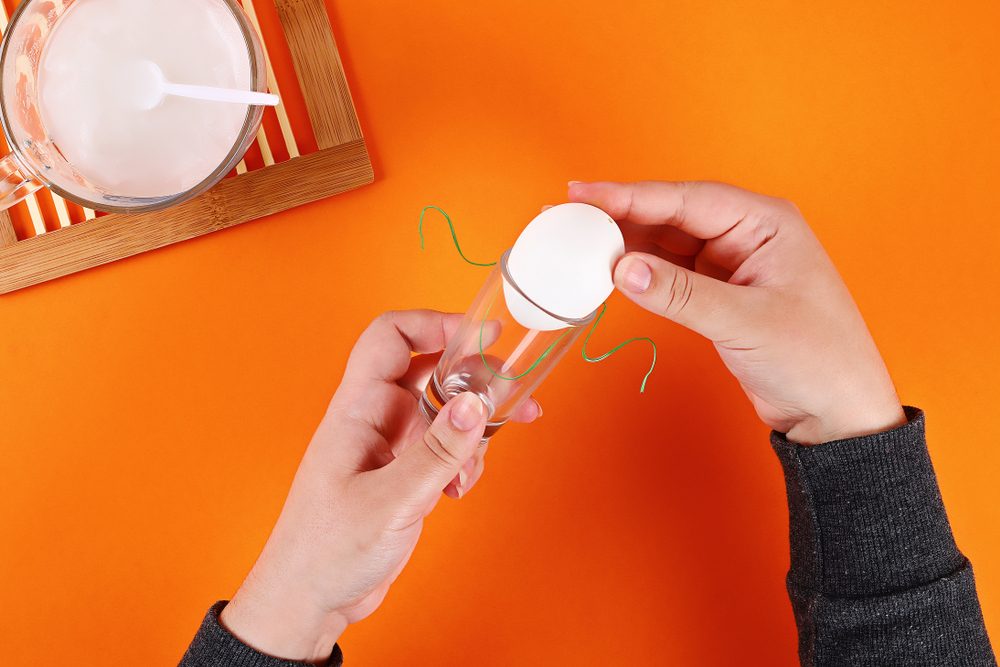
Next, place your form on a baking sheet and cut a piece of cheesecloth to size. Do this by placing the cheesecloth over the form and making sure that it comes to the ground in the front and back. Once you have the right size, it’s time to get started!
Next, dip the cheesecloth into the liquid starch and make sure it gets coated thoroughly. Remove the cheesecloth from the starch and squeeze excess starch from the cloth before placing the wet cloth over the form. Then adjust the cloth so that you have the shape you want.
Last, allow the cloth to dry completely. If you want to speed things up, you can use a blow dryer set on “low”. Once the cheesecloth is totally dry, you can remove it from the form and add whatever decorations you’d like for a face! I prefer simple black felt circles for eyes, but you can also use googly eyes if you’d prefer. Then ta-da! You’ve got one BOOtiful ghost!
If you want to take it a step further, try adding a flameless tealight candle underneath. Or accessorize your ghost with a darling mini bunting, pumpkin, or other Halloween decorations. It’ll add a little more spook to your Spook.
Idea 02: Hanging Ghosts
If you have trees in your yard, then these are awesome to do!
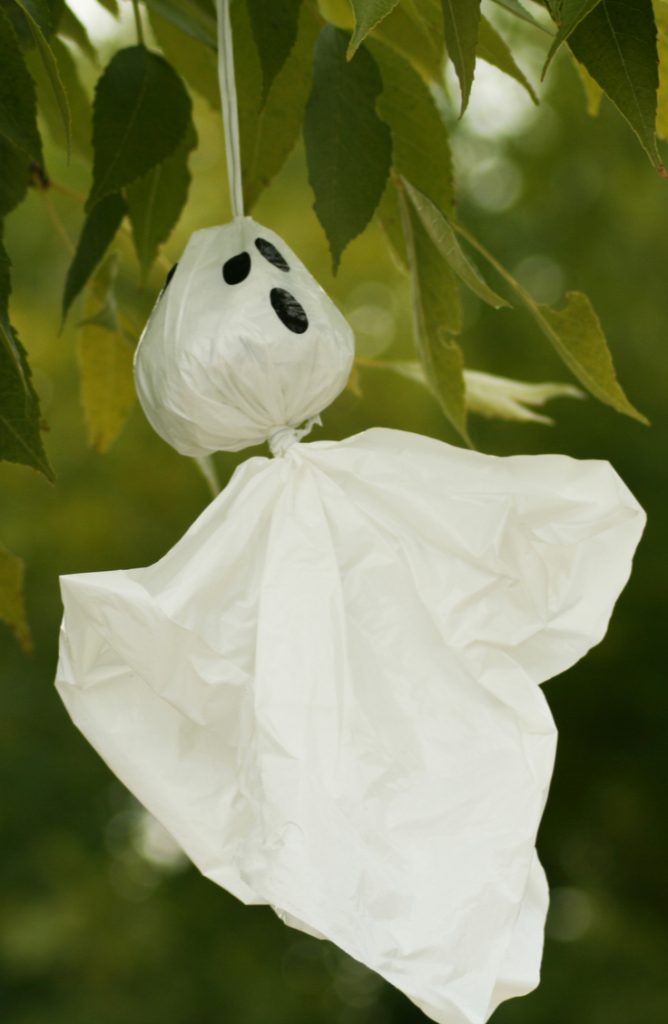
Materials:
- Foam balls (alternatively, I’ve done this with Tootsie pops)
- Tissue paper
- Yarn or ribbon
- Permanent Marker
- Fishing Line, basting needle
Process:
Start by laying your supplies out on the counter. Next, grab a piece of tissue paper, and place a foam ball in the middle. Then simply wrap the tissue paper around the foam ball and tie with a piece of yarn or ribbon. Last, draw some ghosty eyes with a permanent marker and use the basting needle to add a loop of fishing line. Ta-da! You’re done!
If you live in an area where it’s prone to rain before Halloween, you can totally do these using white grocery sacks instead of tissue paper!
Now get on out there and get your ghost craft on with these BOOtiful DIY decor ideas. Happy Halloween!

Leave a Reply